 |
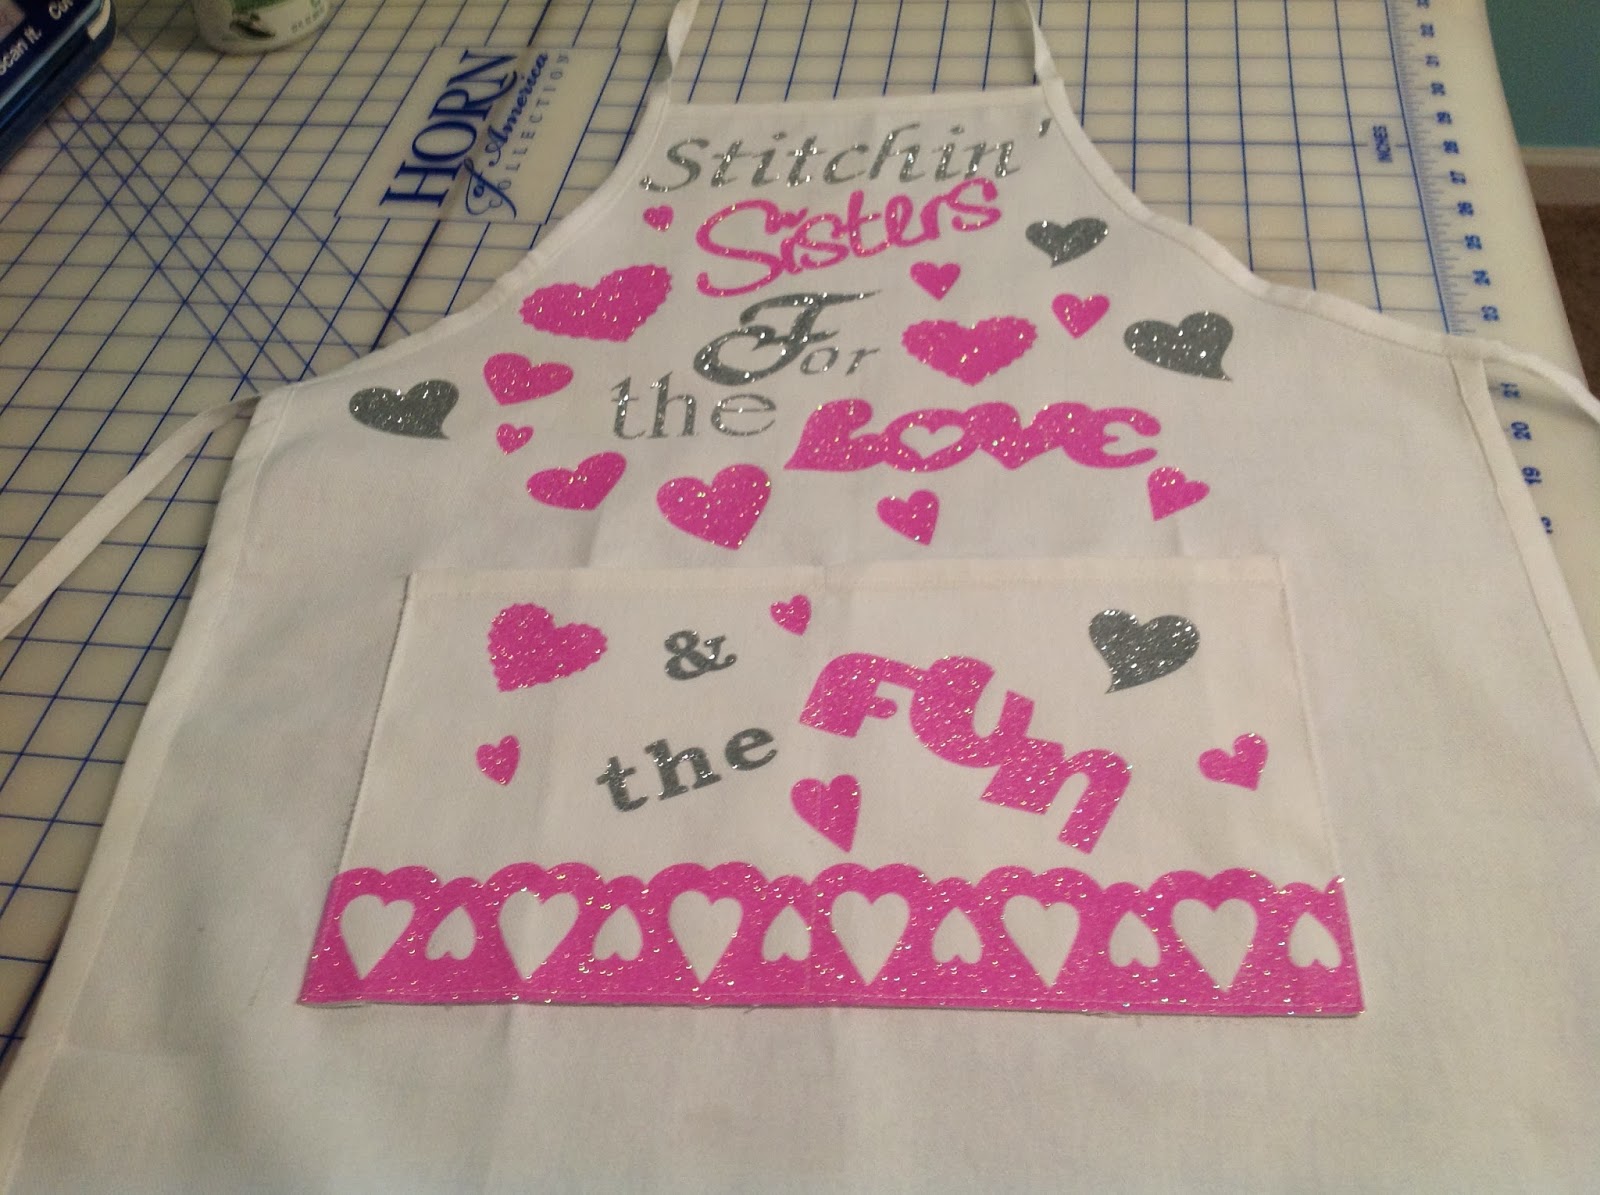
| I used heat transfer vinyl to create this apron for the Stitchin' Sisters event our dealership is hosting. |
For those of you who know me you know that I am in no way a vinyl or screen print master. I am a raised textile artist by trade and it is my first love. I did however recently purchase a Brother Scan and Cut and I have really enjoyed cutting out fabric and making appliques with this wonderful tool. What surprised me the fact that I was interested in using vinyl as well (for those times when you don't have the energy or where with all to embroider an item for one time wear).
The first thing I learned while attempting to order some vinyl was how many different types there are! There are outdoor vinyls, indoor vinyls, heat transfer vinyls, glittery vinyls, flocked vinyl, printed vinyl, vinyl that has transfer tape adhered to it and vinyl that requires YOU to add the transfer tape (yeah- that was a fun day).
I found that I prefer the type of heat transfer vinyl that has the transfer tape already applied. It seems this type is a little more expensive but the ease of use is worth it to me. I ordered mine from Siser and it was called 'easy weed' which means it was easy to remove the 'left-over' parts. I have friends who use vinyl cutters but I am a newbie at this so I just went with it.
 |
| This is what the glitter heat transfer vinyl looks like. |
Once the vinyl arrived at my house I was a little surprised to feel how thick it was, IT WAS THICK and I wasn't sure that the cutter blades would cut it. I want to mention that I myself didn't find the book that came with my cutter to be very handy. At first this irritated me and then I realized that there are literally hundreds of materials that you can cut with this machine and there just was not a way for them to impart that into one tiny little black and white booklet.
So I did what I always do...jumped right in and messed up some vinyl. Now some people get stressed when they ruin a project but I don't because I count my failures as learning lessons-hard won and not cheap but learning lessons none-the-less.
The first thing I learned is that if you want to cut heat transfer vinyl you have to reverse the letters...always reverse the letters.
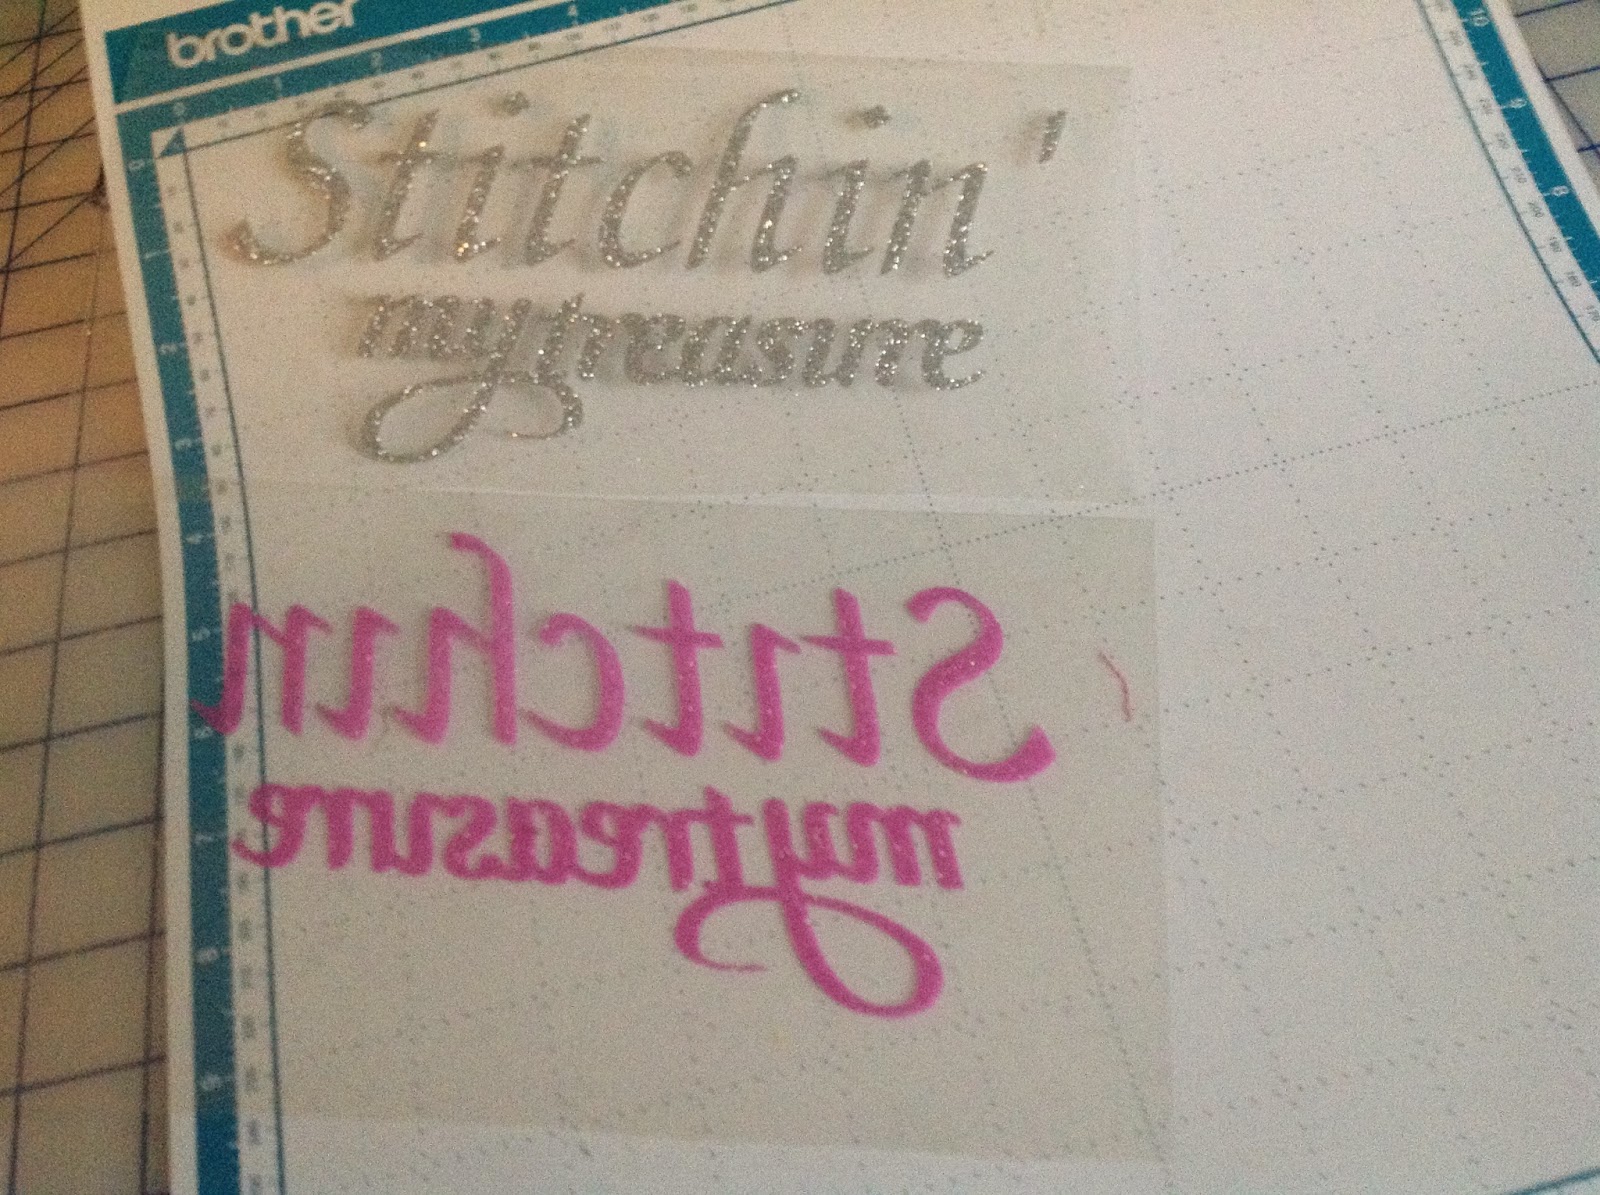 |
| See the pink one? It's backwards because I forgot to reverse it. |
To create the apron we needed to use the machine lettering and designs or use the Cloud Based Software Brother Scan Cut Canvas, you just sign up and you can use the software to create anything you like. What we created could also be created right at the screen on the Brother Scan and Cut machine.
Once the software is open you can see that the screen looks a lot like the mats that came with your machine and you can move things around to create the type of cut files you would like.
 |
| This cloud based software is easy to use and even has a PDF that you can open and download if you are into that type of thing... |
Once I had all the hearts, words and designs that I wanted to cut I used the download button and a thumb drive to save the design.
 |
| Click on the Download Button |
 |
| A little window will pop up asking you to 'right-click' on the file name that is underlined, just like in the picture. |
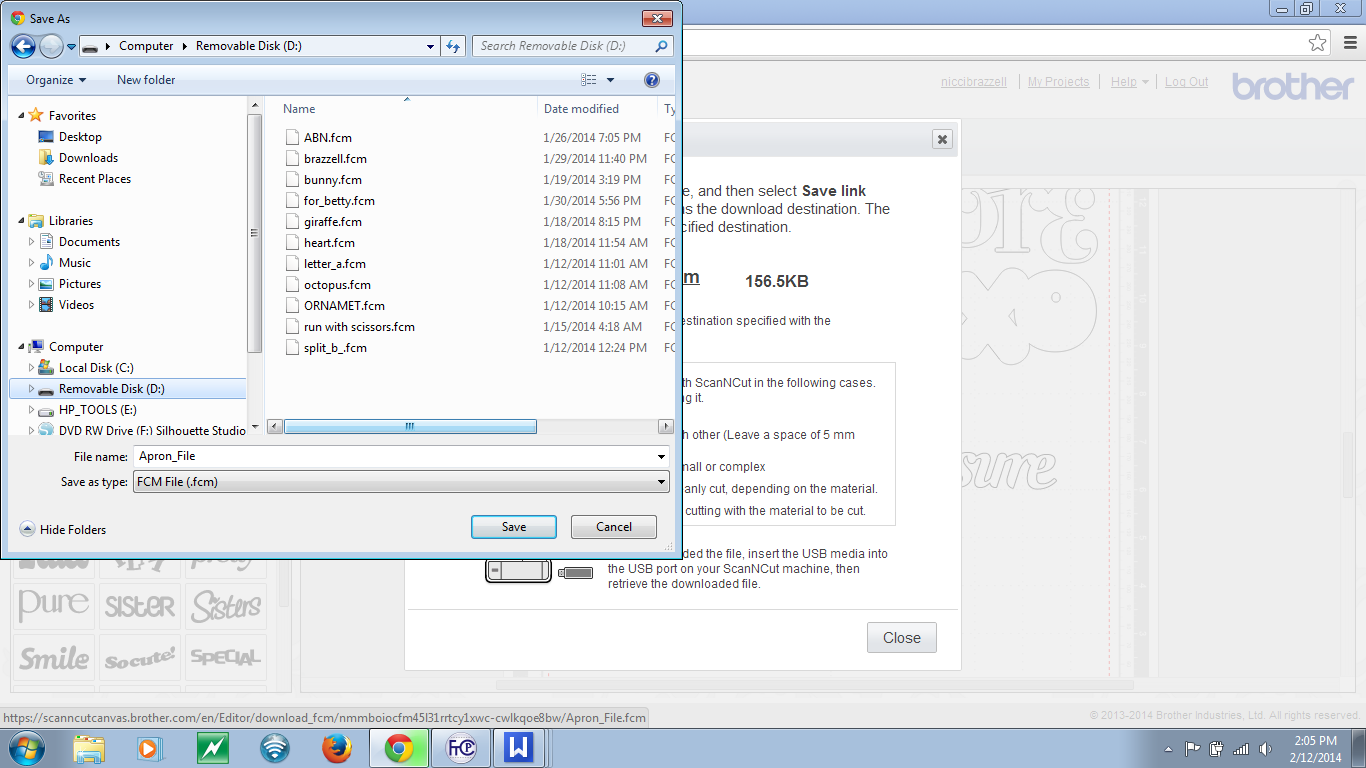 |
| Once you 'right-click' the computers browser will open and you will need to locate your thumb drive and save the file there. You can follow the directions on the screen from there but basically the design is now on the USB stick and you can insert it into your machine and load your design to be cut. It really is that simple. Now remember I mentioned that if you have lettering you need to reverse it? Well you need to do that at the machine, basically click on any areas of the design that are lettering and mirror image them. (The instructions on how to do this are in the manual that came with your machine). From here on out we are going to do this in a step by step fashion. Step 1. Load the mat (just kidding). Using the standard mat cut a piece of the vinyl a bit larger than the size the design you created. When placing the vinyl onto the mat place it SHINY side down, trust me...the GLITTER SIDE GOES FACE DOWN. It doesn't make any sense to me either but the vinyl God's have deemed it so. |
123.hp.com/dj2635
ReplyDeleteThank you. I just wanted to know where to ship it since I know now to keep producing it
ReplyDeletehp envy 5020 software
Nice Blog, Do you want to Install a user guide for Canon Printer for your mac operating system?Then visit the 123hp.com setup to get the software and driver for better functioning of your printer. You can also call our expert canon support team for services
ReplyDeleteActivation of amazon Prime should be possible from either connect www.amazon.com/mytv or Primevideo.com/mytv. Both connection give admittance to amazon prime sign in and activation. User should have 6 Digit Activation code before login to this connection. Amazon prime membership can begin after you login to these connection.
ReplyDeleteRead more…
www.primevideo.com/mytv